Jana Girdle - Installation Guide |
|
-
The diff cover bolts we use are a little longer than factory so make sure that the threads
are clean and deep enough to accommodate the longer bolts such that you do not get a
false torque as the bolt jams dirt in the bottom of the hole or runs out of thread. For
D44 housings you will have to drill out the 5/16" threads and tap to 3/8 threads.
-
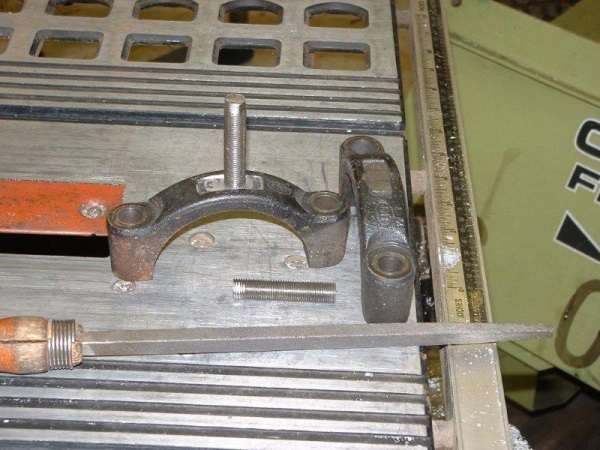
Machine or file the top of the main caps flat such that it's mating surface with the end of
the jack bolt is flat.
-
By putting them on a flat table and lining them up with a vertical line in the back ground
(like a door Jamb) in two directions you can tell right off when they stand straight they
are ready for a installation. By filing just down the middle you remove no more material
than to get to the bottom of the raised cast numbers thus no strength loss.
-
Use a flat file to make sure that all mating surfaces on the cover and the differential
housing are flat. (the differential housing gasket surface usually gets raised a bit when
prying the diff case in and out several times during set up)
-
Install four main cap studs through main caps, wrist tight.
-
Install four non-locking 1/2 x13 nuts, 80 ft lbs. I made a 3/4 socket with the back end hand
ground like a spark plug socket drive to reach the nuts. You then drive this socket with
another socket and torque wrench.
-
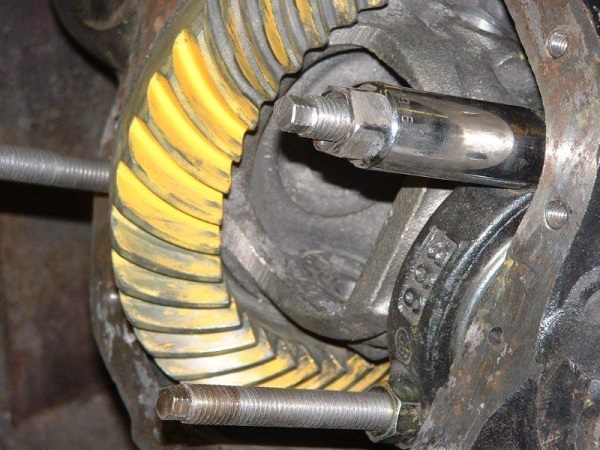
Practice placing cover over studs, push down very evenly as it is easy to bind while trying
to place over all four studs at once. If the cover gets stuck all the way down, you can
remove it by installing the 7/16 jack bolts and turning them in evenly. (make sure the
jack bolts are backed off sufficiently prior to final cover installation)
-
Put two cover bolts in and rotate ring gear, to verify clearance. Covers are
preclearanced but I haven't checked every aftermarket combo. Besides needing ring
gear clearance sometimes just the heads of the ring gear bolts catch the inside slope of
the cover. Grind cover for clearance if necessary.
-
Verify all bolts can be put in three turns easily by hand. If the cover bolt holes are out of
line die grind or file accordingly. Sorry about this but the tolerance on the location for
these seams to vary a bit, and the holes start out where Ruff Stuff puts them.
-
Now that you know how to slide it on and off and all bolts thread in straight, put a thin
layer of "the right stuff" on the cover mating surfaces and around the four main cap
studs and nuts.
 Note:
"the right stuff" is made by Permatex and is a combined sealant and adhesive. You
can get it at most parts stores. Don't get it in the aerosol can. Get it in the tube or caulking gun as the can
plugs up after a couple of days.
Note:
"the right stuff" is made by Permatex and is a combined sealant and adhesive. You
can get it at most parts stores. Don't get it in the aerosol can. Get it in the tube or caulking gun as the can
plugs up after a couple of days.
-
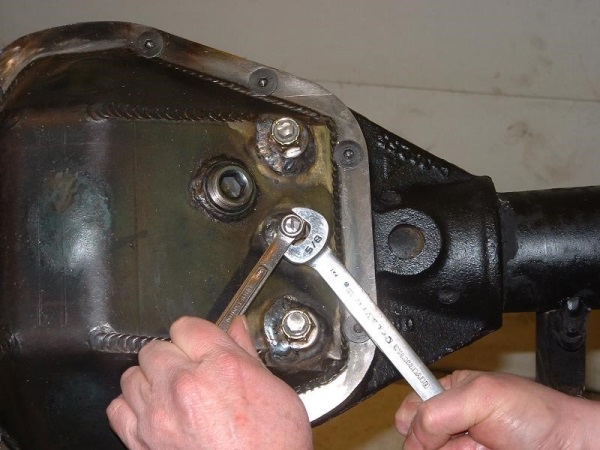
Install ten cover bolts and torque to 45 ft lbs.
-
Install four 1/2 x 13 nylock nuts and torque to 80 ft lbs.
-
Install two 7/16 jack bolts and torque to 6 in lbs. THAT IS INCH LBS NOT FOOT LBS. Note:
If you do not have an inch lb torque wrench, this is LIGHTLY wrist tight with a nut driver.
-
Mark the location of each jack bolt. Holding the jack bolts so that they don't turn,
tighten the 7/16 nylock nuts as tight as you can get them by hand with a hand wrench.
Note: Covers originally came with counter sunk fasteners; however, they kept coming
loose as they are working to hold the differential in place preventing gear deflection.
Covers are now supplied with standard grade 8 hex bolts so that a full 45 ft lb of torque
can be applied. As metal has a tendency to "creep" under stress (bolts stretch a little),
re-torque cover bolts after each 4x4 run until you find that the bolts no longer require
re-torqueing. But make sure that you check them for looseness frequently. The carrier
cap studs and jack bolts should not require re-torqueing.
rev: A, date: 1/4/2013
Copyright Jantz Engineering, All rights reserved.
|